
How To Wear Collar Bar Pin? In 6 Easy Steps
A collar bar pin spaces the collar points and lifts the knot, creating a cleaner, more intentional look, provided your shirt supports it. Start with a compatible shirt or detachable collar, then set the bar so it sits level and hidden behind the tie. With the right setup, you’ll wear it in under a minute.
The bar sits across the collar points and locks them in place by threading through holes or posts. Place the bar about 1 cm below the knot for most shirt spreads, then level it so the bar is horizontal. When aligned, the bar stays unobtrusive and the knot sits neat and high.
Key Takeaways
- Compatibility check: Ensure your shirt or detachable collar has holes or channels for a bar pin.
- Height placement: Start about 1 cm below the knot; adjust for your collar spread.
- Horizontal alignment: The bar must be flat and level across the collar.
- End security: End caps or pins should be engaged so the bar won’t rotate.
- Practice in front of a mirror: A quick check saves time during the day.
- Care after wear: Wipe the metal and store in a pouch to prevent tarnish.
Prerequisites for wearing a collar bar pin
A collar bar pin works only with shirts that have anchor holes or channels, or with detachable collars that have matching holes or posts. If your shirt lacks these features, the bar will look misaligned or sit visible behind the tie. With the right shirt, the bar stays snug and nearly invisible under the knot.
Before you buy, measure the gap between your collar points and confirm there’s an anchor point for the bar. If you’re new, choose an adjustable bar or one with cushioned ends to reduce skin contact and snag risk. Work over a clean surface with a mirror so you seat the bar precisely without tugging the fabric.
What is a collar bar pin and how it works?
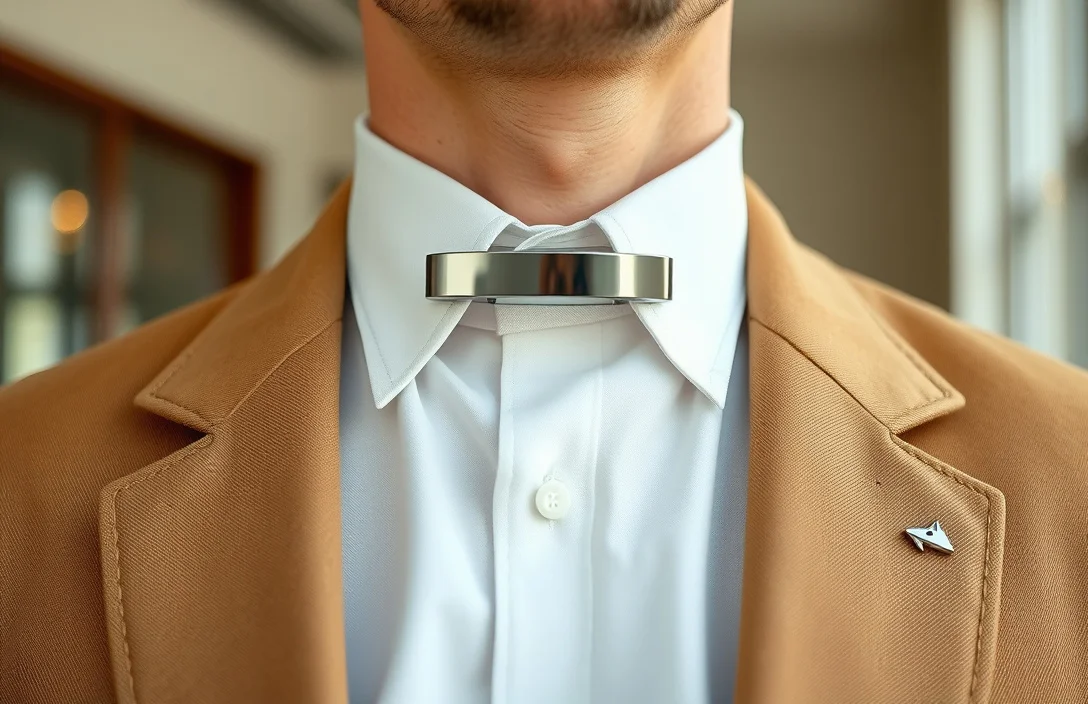
Collar bar pins are a two-part accessory: a slim bar and anchors that grip the collar. The bar runs horizontally at the base of the collar points, usually just under the chin. The goal is to keep the points evenly spaced and raise the tie knot slightly for a more formal look. Some designs rely on push-through pins; others use tiny screws or friction-fit ends. The result is a crisp line across the collar with less flutter when you move.
Avoid a bar that sits too high or too low. If it’s too high, it pushes the knot up and crowds the throat. If it’s too low, the points won’t stay separated and the look loses its polish. The best result comes from a bar that sits flush against the fabric and remains level no matter how you move.
How to wear it in 6
- Check the shirt first: Inspect the collar for holes or channels; verify the distance between points matches the bar length.
- Prepare the knot: Tie your necktie so the knot sits where you want it; a neat knot helps the bar hide behind the tie.
- Position the bar across the collar: Hold the bar under the chin and align it with the collar points so it sits centered.
- Insert or anchor the ends: If your bar uses holes, slide the ends through; if it’s a pin design, press the pins through the holes.
- Level the bar: Gently rotate or adjust the ends until the bar is perfectly horizontal. A tilted bar is visible and defeats the effect.
- Check in the mirror: Look for a clean line from the knot down; the bar should be barely noticeable behind the knot.
For a classic hole-through bar, this works with most mid-spread shirts. If you wear a spread collar, you may need a longer bar to keep the points apart without fighting the knot height. Start with a standard length and trim only if you have a bespoke shirt with a wider spread.
Variants and how they differ
| Type | How it works | Pros | Cons |
|---|---|---|---|
| – | – | – | – |
| Classic hole-through bar | Bar sits across the collar and ends go through small holes in each collar point | Clean, traditional look; secure fit | Requires holes or detachable collars; not universal |
| Pin-end bar | Ends act as pins that anchor into fabric | Quick to fit; works with many shirts | Can poke skin if not padded; bulkier end caps |
| Adjustable length bar | Length can be tuned to fit different collar spreads | Flexible for multiple shirts | Slightly more complex; potential wobble if loose |
| Detachable-collar compatible bar | Specifically designed for detachable collars with anchor points | Ideal for formal wear with detachable collars | Limited to detachable-collar setups; less common |
Pros usually include a sharper, neater line and a higher knot; cons include compatibility limits and potential skin contact if ends aren’t padded. If you wear a variety of shirts, an adjustable or detachable-collar compatible bar is the safest bet.
Common mistakes and troubleshooting
Flaws crop up when the bar isn’t aligned or the shirt isn’t prepared. A crooked bar draws attention and makes the neckline look off. If the bar isn’t level, the tie knot looks lopsided; re-seat and re-level before stepping away from the mirror. If you feel pin pressure on the skin, switch to a version with cushioned ends and verify that the pins are fully recessed.
The most frequent misstep is forcing a bar into a shirt without compatible holes. Stop and re-evaluate your shirt choice. A mismatched bar is worse than not wearing one at all. Another common issue is a bar that sits too high, crowding the neck and restricting movement. Adjust the height by selecting a shorter bar or moving the bar slightly lower on the collar.
Care and maintenance
Wipe the bar with a soft cloth after wearing to remove oils and sweat, then dry it before storing. Tarnish develops faster on humidity-prone skin or if you sweat heavily; store in a pouch or small box to help. If you notice rough edges, buff with a microfiber cloth to prevent snagging. Avoid dishwasher detergents or bleach, which can corrode finishes over time.
Some bars have interchangeable ends; keep the spare ends in a small compartment. Regularly inspect the anchoring points; loose ends can rotate and reveal misalignment. If you travel, carry a compact cleaning cloth and a tiny screwdriver (for screw-end designs) so you can re-tighten on the go.
Outfit integration and practical tips
The collar bar pin works best with crisp, formal shirts and a well-knotted tie. For a classic business look, pair it with a charcoal or navy suit; the bar stays subtle and the knot rises slightly, creating a strong vertical line. If your wardrobe leans toward lighter fabrics, choose a bar with a low-profile finish to avoid glare under bright lighting.
For daytime events, a simple, clean bar on a white or light-blue shirt reads as refined rather than flashy. Avoid bright, highly polished bars with a light suit; matte finishes read as sophisticated and reduce glare. A compact knot like a four-in-hand keeps the bar proportionate to the collar and tie.
Choosing the right setup for your wardrobe
If you wear a variety of shirt collars, look for an adjustable bar that can span different gaps. For detachable collars, ensure the bar aligns with the collar holes without requiring excess force. A high-quality bar with cushioned ends minimizes skin irritation and keeps the look neat, even after a long day. Stock at least one spare set of endcaps or pins in your travel kit, so you’re never caught without a secure fit.
Build a small kit: one classic bar, one adjustable model, and a spare set of ends. This keeps you ready for standard dress shirts, detachable collars, and a range of collar spreads. With the right kit, you can switch between shirts and maintain a consistent, polished neckline.
Practical verdict and next
If you want a clean, formal line without bulky hardware in view, start with a compatible shirt and a standard bar pin. Practice once in front of a mirror, then keep the bar in a small pouch for travel and quick fixes. Next step: check one dress shirt you own for compatibility, then test the setup in front of a mirror to confirm the right height and alignment.
FAQ
How much does a collar bar pin typically cost?
A collar bar pin commonly runs between $15 and $35, depending on material and craftsmanship; a mid-range pin generally sits around $25.
How long does it take to learn wearing it correctly?
With practice, 30-60 seconds to set the bar, align it level, and adjust the knot height. If you’re new, allow a couple of minutes the first few times so you can mirror-check the alignment.
Can I wear a collar bar pin with a necktie?
Yes. Use a standard knot and place the bar about 1 cm below the knot for a balanced look; if the collar spread is wider, you may need a longer bar to keep the points apart.
What is the most common mistake people make?
A crooked bar caused by misalignment or a collar without anchor holes; always verify the bar sits level and that both collar points are evenly spaced.
What are good alternatives if my shirt doesn’t support a bar pin?
If your shirt lacks holes or channels, use a traditional collar stay or a tie bar placed below the knot. For detachable collars, the collar bar remains a strong option when anchor points exist.