How To Use Collar Pin? Tips For A Sharp Formal Look
Can You Use a Collar Pin?
Yes. A collar pin links the collar points and raises the edge for a crisp, vintage-formal line. Only shirts with pre-punched holes near the collar tips accept a pin; proper placement prevents tearing. For a statement finish at formal events, a collar pin is worth mastering.
A collar pin passes through the collar holes to link the points and lift the edge for a sharper silhouette. It works best with a classic spread collar and a standard tie knot; when placed correctly, it stays secure and adds a subtle, vintage touch to formal attire.
Key Takeaways
- What it does. A collar pin links the collar points and lifts the edge for a crisp, formal look.
- When to wear. Best for formal events or outfits with a classic spread collar.
- Prerequisites and fit. Requires shirts with pre-punched holes near the collar tips.
- How to position. Align holes and push the pin through from outside to inside.
- Care and maintenance. Wipe after wear and store in a pouch to prevent scratches.
- Common mistakes. Don’t force the pin; misalignment can tear fabric.
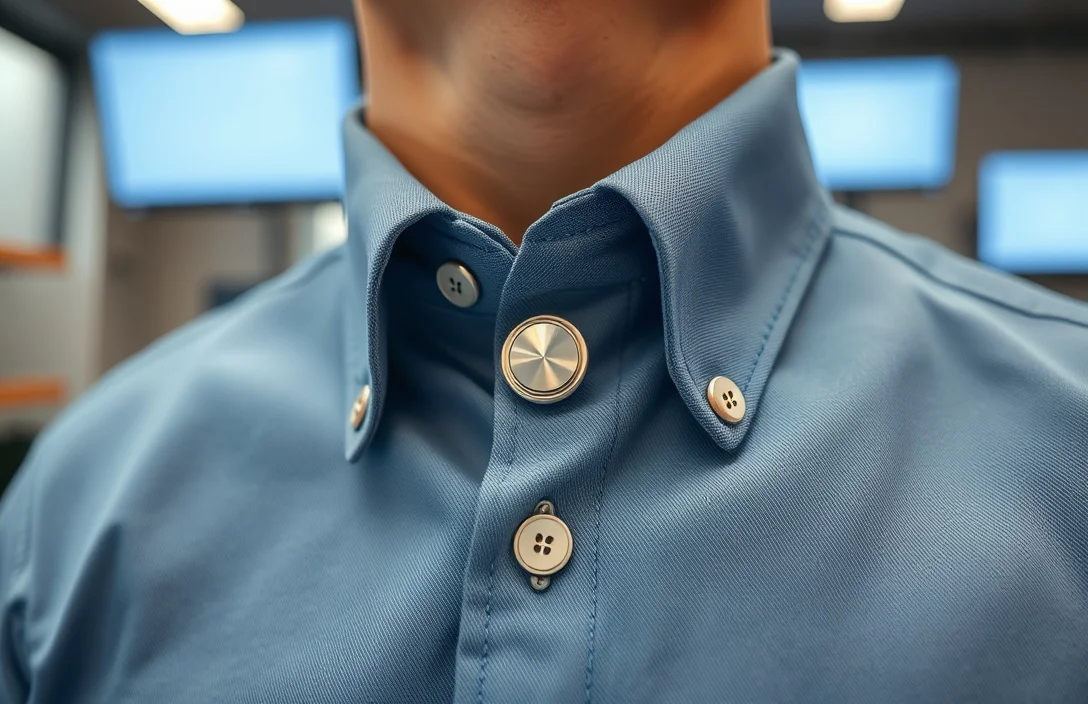
What a collar pin is and how it works
A collar pin is a small metal piece that inserts through two near-tip holes or slits in the collar to pull the points inward. When correctly positioned, the pin acts as a bridge between the two collar tips, reducing spread and lifting the collar edge. The result is a neater line that frames the knot and adds a touch of vintage formality to a modern shirt.
The right shirt matters. Collar pins work best on classic spread collars or collars with compatible short holes near the tips. If your shirt lacks the openings, the pin won’t seat properly and can look sloppy or cause fabric damage. In practice, you’ll see the most consistent results on shirts designed for formal wear or vintage-inspired pieces that replicate that era’s collar construction.
Skip a collar pin on very light fabrics or delicate collars. The pin’s pressure can leave tiny impressions if the fabric isn’t sturdy enough, especially after long wear. Test the feel on a rehearsal day before wearing it to a big event.
Prerequisites and compatibility

A collar pin requires a shirt that accommodates it. Look for pre-punched holes near the collar tips, or a collar design with a compatible opening. If your shirt lacks these features, the pin won’t seat properly and could tear the fabric around the holes.
Heavier fabrics pair well with a collar pin because they balance density with the pin’s small footprint. Lighter dress shirts, especially those with flexible fabrics, can show pin marks if you push too hard or reposition frequently. If you routinely switch between casual and formal looks, reserve the collar pin for formal day or evening wear rather than casual office days.
For example, a medium-weight cotton spread collar shirt from a formal line often has two tiny holes at the collar tips. On these shirts, the pin glides through cleanly and stays aligned with the collar’s natural line. If a shirt lacks holes, consider alternates like a collar bar or collar stays that provide similar structure without piercing the fabric.
Before you buy, verify: the holes are positioned symmetrically, the pin length fits the collar spread, and the pin’s head won’t protrude past the collar edge when the knot is tied. If you’re unsure, take the shirt to a tailor or test a trial fit at home to see whether the pin sits flush and doesn’t affect your knot.
how to use a collar pin
Getting this right requires a steady hand and a moment of prep. Loosen the top button and the knot, so you have room to work. Align the collar so the holes sit directly above the collar tips. Slide the pin through from outside to inside, catch the backing, and secure. Recheck after you’ve tied the knot to ensure no visible marks or fabric strain.
1) Check the shirt and holes. Confirm the holes align with the collar tips and aren’t distressed. If the holes feel rough, smooth them with a tailor’s tool or choose another shirt.
2) Loosen the neckwear. Unbutton the top button and loosen the knot to access the collar from the outside.
3) Align the holes with the tips. Hold the collar flat and ensure the two holes sit squarely above each tip.
4) Insert the pin. From outside to inside, slide the pin through both holes so it sits flush with the fabric. The head rests atop the collar, not against skin or fabric.
5) Secure the backing. If there’s a back clasp, slip it into place and test stability.
6) Check the line. Tie your knot and adjust for a clean vertical line from knot to collar tips.
7) Recheck after wearing. Stand and move to confirm the pin stays in place without creating uneven lines or creases.
8) Remove safely. When taking the shirt off, reverse the steps slowly to avoid pulling threads.
In practice, the pin should feel secure but not pinch the fabric. If you notice pinching, shifting, or visible wear, stop and reassess your shirt choice or pin size.
Examples and scenarios

For a tuxedo-inspired look, pair a charcoal or midnight navy suit with a crisp white shirt and a classic knot. The collar pin adds controlled stiffness that complements the formal vibe and visually lengthens the neck. It’s a subtle flourish when aligned correctly.
In a business setting, reserve the collar pin for important client meetings or formal events. For daily office wear, a neat tie with a standard collar and no pin provides a cleaner, more versatile appearance. The pin’s visibility signals intentional style, so use it sparingly to preserve a professional air.
If you’re wearing a double-breasted jacket or a very broad knot, you may not need the pin. The extra fabric and knot bulk can lift the collar enough; a pin could crowd the front. In those cases, consider a collar stay or collar bar as a lighter option.
For vintage-inspired looks, choose pins with period-appropriate finishes – brushed nickel, brass, or gilt – that echo the 1920s and 1930s. Pick a pin proportionate to your shirt’s collar width and typical knot size.
Troubleshooting and common issues
Fabric tearing around the holes is the most common problem. If you see fraying, switch to a sturdier shirt or avoid forcing the pin. Misalignment creates an uneven collar line; remove and reinsert with the holes centered.
Pins bending or losing their shape mean you’re applying too much pressure or using a pin too long for your spread. Use a shorter pin or a different style. A pin that pokes through the fabric can rest against your skin.
Removing a stubborn pin can be tricky. Gently back out the pin while supporting the collar from behind. If it resists, stop and recheck alignment. Replace worn or bent pins for repeated use to avoid damage.
Avoid pairing the collar pin with shirts that have very soft collars or delicate weaves. The weight can crease the fabric, leaving an indentation that looks accidental. If in doubt, test on a non-event day to gauge impact.
Maintenance, care, and storage
Wipe the pin with a soft cloth after wear to remove oils. For copper or brass finishes, a tiny dab of metal polish helps maintain luster, but avoid abrasive cleaners. Store pins in a soft pouch or small jewelry box to prevent scratches.
Check the holes periodically for wear. If edges become rough, take the shirt to a tailor or consider a replacement pin designed for tougher fabrics. Keep pins dry; moisture can cause minor tarnish over time.
Store pins in a dedicated place. A small box labeled for menswear keeps them organized and prevents misplacement. When traveling, wrap pins in a microfiber cloth to protect the finish.
Alternatives, buying guide, and trends
If a collar pin feels fussy or risks fabric wear, alternatives provide similar structure without holes. A collar bar attaches at the collar points and spans the front, lifting the points without piercing. Collar stays add stiffness inside the collar for a modern, low-profile look.
Material matters. Stainless steel is durable and affordable; brass offers warmer tones that pair with brown or charcoal suits. Higher-end options use solid precious metals or plated finishes with precision machining for smoother insertion and less fabric wear. Price varies by material and brand, with a clear gap between budget and premium options depending on finish and durability.
Buying tips:
- For beginners, choose a simple, polished finish with a length that matches your collar spread.
- Check the back clasp type and ensure it’s secure enough to stay put.
- Prefer pins designed for fabric thickness similar to your shirts to minimize wear.
- Test a pin on a similar shirt before using it for a formal event to gauge wear and comfort.
Comparison table: Collar Pin vs Alternatives
| Item | Best For | Visibility | Shirt Compatibility | Pros | Cons |
|---|---|---|---|---|---|
| Collar Pin | Vintage formal looks | Subtle when used correctly | Requires holes near collar tips | Sharp, period-accurate line | Can damage delicate fabrics; needs compatible shirt |
| Collar Bar | Non-piercing stiffness | Visible but controlled | Works with many collars | Durable; easy to adjust | More noticeable; bulkier under tie |
| Collar Stay | Modern minimalism | Invisible from outside | Works with most dress shirts | Maintains collar shape without holes | Less dramatic; weaker effect on height |
| No Pin | Casual or versatile | None | Flexible; no holes needed | Maximum compatibility; easy care | Lacks added formal structure |
Your choice depends on the shirt’s construction and the occasion. For a vintage aesthetic, go with a collar pin; for daily office wear with a clean, modern look, a collar stay or bar often makes more sense.
Cost, care, and getting started
Prices vary by brand, material, and finish. Start with a single pin that matches your shirt’s weight and collar width, then expand as you settle on a look. A basic starter pin costs less than a premium one, but durability and finish improve with higher-quality options.
Care is simple: wipe after use, store in a soft pouch, and keep dry. Inspect hole alignment and the pin’s head regularly; replace if you notice bending or a loose backing.
Next steps: choose a pin whose tone matches your metals (watch, belt buckle, cufflinks), test it at home on a familiar shirt, and decide whether you’ll wear it for special occasions or daily use. If it feels fussy or risks fabric wear, switch to a collar bar or stays for a similar effect with less stress on the fabric.
FAQ
How do I know if my shirt is collar-pin ready?
A: It has small holes or slits near the collar tips designed to receive a pin. If holes aren’t present, the pin likely won’t seat properly and may damage the fabric.
Q: Will a collar pin ruin my shirt?
A: It can cause minor wear at the hole edges over time if the fabric is delicate or the pin is forced. Choose sturdy fabric and ensure proper alignment to minimize wear.
Q: Can I wear a collar pin with a necktie and a suit?
A: Yes. Pair it with a classic spread collar and a standard tie knot for a formal, vintage look under a suit jacket.
What’s the difference between a collar pin and a collar bar?
A: A collar pin pierces or sits through the collar to join points, while a collar bar sits across the front, lifting the points without piercing. Pins offer a stronger, vintage effect; bars are subtler and easier on the fabric.
How do I remove a collar pin safely?
A: Gently back out the pin from the holes with steady pressure, supporting the collar from behind. If it resists, stop and recheck alignment before continuing.
Verdict: A collar pin adds a deliberate, vintage touch that elevates formality when used with a compatible shirt and a well-tied knot. Practice at home first, then wear it for events where the polish stands out. If it feels fussy or risks fabric wear, switch to a collar bar or stays for a similar effect with less risk.
Next step: pick a lightweight, well-made collar pin with a finish that matches your other metals, test it on a familiar shirt, and decide whether you’ll use it for special occasions or daily wear.