How Do You Put On A Tie Collar Bar Pin?
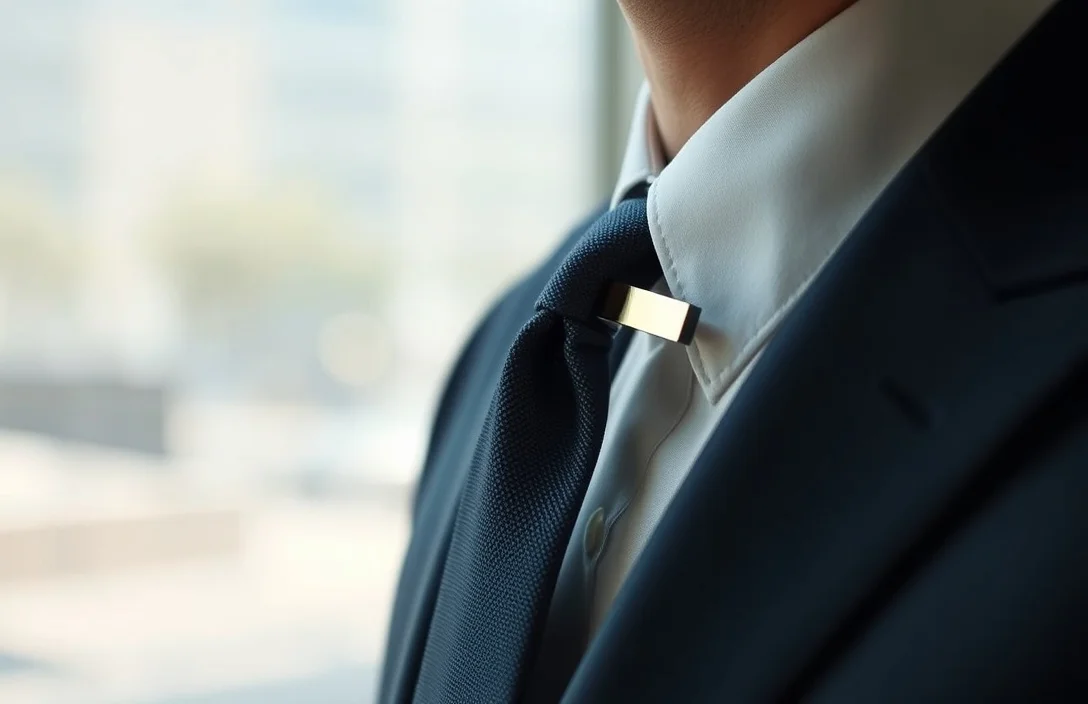
Place a tie collar bar pin between the two collar points to lock your knot and keep the tie aligned. The pin should sit close to the knot, not near the lapel, and only on shirts with a standard spread. Use a pin length that matches the distance between points, typically 1/2 to 1 inch.
A tie collar bar pin is a slim, locking pin that passes through both collar layers and anchors the tie. Insert the pin from the outside, push through the outer collar and inner layer, then fasten the back clasp. For most dress shirts, a 1/2 to 1-inch pin length fits best.
Key Takeaways
- Placement matters. Place the pin between collar points, near the knot, to prevent shifting.
- Right length helps. Most shirts use 1/2 to 1 inch of pin length; too long crowds the knot.
- Insert from outside. Push through both collars until the head rests above the knot.
- Secure the back. Engage the locking part to stop wobble.
- Remove carefully. Slide back through fabric slowly to avoid tearing.
Step-by-Step Quick Method
For a tie collar bar pin, start with a clean shirt and a centered knot. Aim for a clean line from knot to tie without wobble or distraction.
Align collar points and knot evenly. Hold the pin with the head above the knot and the sharp end downward. Insert from the outside, guiding through both collar layers until it exits the inner layer. Secure the back by sliding or snapping it into place. Check alignment and adjust the knot if needed. Release and reposition if the knot or tie bulges.
1) Align the collar points and knot evenly.
2) Grip the pin with the head above the knot and the sharp end downward.
3) Insert from the outside, guiding through both collar layers until it exits the inner layer.
4) Secure the back by sliding or snapping it into place.
5) Check alignment and adjust the knot if needed.
6) Release and reposition if the knot or tie bulges.
The quick method works best for most standard dress shirts. If you’re dealing with a particularly stiff collar or a very narrow spread, proceed with extra care to avoid tugging.
Choosing the Right Pin for Your Shirt
Not all tie collar bar pins are created equal. Length matters, but so does the back design and metal finish. The wrong choice can look awkward or shift during wear. Start with a pin that matches your shirt’s collar spread and your usual dress code.
Consider three basics: length, back mechanism, and material. Length should bridge the distance between the collar points without poking out. The back should lock securely or grip firmly without slipping. Material matters for tarnish resistance, comfort, and durability. Stainless or gold-tone options resist wear and look sharp across outfits.
| Type | Pros | Best For | Typical Price |
|---|---|---|---|
| Classic straight pin | Simple, ultra low profile | Everyday wear | $5-$12 |
| Locking collar bar | Secure, minimal wobble | Formal settings | $12-$25 |
| Tarnish-resistant metal | Durable, long life | Daily wear, travel | $8-$20 |
| Decorative/engraved | Subtle flair | Special occasions | $15-$40 |
Expect to spend modestly for entry-level options; see higher prices for specialty finishes or engraving. If you wear ties weekly, a locking pin addresses most concerns about movement. For daily office wear, a classic straight pin is often sufficient.
In practice, choose a length that fits your collar spread. A 1/2 inch length is typical for standard spreads; 3/4 inch works well for wider spreads. If you’re unsure, measure the distance between your collar points when the shirt is buttoned and add a touch for clearance.
Styles and Fit: Collar Bar Pins Compared

Different styles affect how the pin sits and its ease of use. The right choice balances security with usability, especially if you handle the pin frequently. A locking back provides simplicity and reliability for daily wear. For special occasions, a decorative finish can add a subtle accent without looking gimmicky.
The locking type is forgiving for those new to collar bar pins. It reduces misalignment and keeps the pin from moving throughout the day. If you prefer a minimal look, a classic straight pin remains a solid option as long as you’re careful when inserting and removing.
Common Mistakes and How to Avoid Them
Rushing the insertion or using the wrong length can ruin the clean line you’re after. Poor technique leaves a visible bulge or worse, tears the fabric. A deliberate, patient approach makes a big difference in how your shirt and tie look.
Common missteps include using a pin longer than the distance between collar points, forcing the pin through stiff fabrics, misaligning the knot, neglecting the back clasp, and yanking the pin out too quickly. Each mistake is easy to fix with a small adjustment and a slower pace. The payoff is a crisp, professional look that lasts all day.
- Using the wrong length. Too long crowds the knot and can poke outward. Use 1/2 to 1 inch depending on collar spread.
- Forcing through fabric. Apply steady pressure and stop if you meet resistance; forcing can snag or tear delicate fabrics.
- Not aligning with the knot. If the knot shifts, readjust the collar points before reinserting.
- Skipping the back clasp. The back lock prevents wobble and keeps the pin in place.
- Rough removal. Gently ease the pin back through both layers to protect the shirt.
When to Wear a Collar Bar Pin
A collar bar pin shines in business settings, formal events, and occasions that call for a precise, structured look. It signals attention to detail and helps your knot stay put through meetings, handshakes, and camera flashes. For casual occasions, skip the pin in favor of a simpler tie clip or none at all.
You’ll get the most value from a collar bar pin on shirts with a standard spread and sturdy collars. If you frequently twist during the day or wear thicker fabrics like flannel, test the pin’s effect on the collar’s stiffness and the tie’s line. If it crowds the knot or makes it appear bulky, remove it for the event or swap to a lighter option.
Care, Maintenance, and Longevity
Like any metal accessory, a collar bar pin benefits from occasional care. Wipe it with a soft cloth to remove fingerprints and oils, especially if worn daily. If you notice tarnish or dullness, a gentle metal cleaner designed for the specific finish is usually safe. Store pins in a soft pouch to prevent scratches or bending.
Prevent bending by avoiding excessive force during insertion and removal. When not wearing the pin, keep it in a small jewelry box or a dedicated pocket to prevent tangling with other accessories. Regular inspection helps catch a loose back or misaligned head before it creates a problem on the go.
- Clean regularly with a soft cloth.
- Store in a jewelry box or soft pouch.
- Check the locking back for wear and replace if loose.
Alternatives to Collar Bar Pins
If a traditional collar bar pin isn’t your preference, several alternatives can achieve a similar effect. A tie clip or shirt clip attaches to the tie and shirt without piercing the collar, offering a quick, reversible method to keep the knot neat. A small lapel pin or decorative tie pin can provide style while serving a similar role.
Tie clips are often the easiest option for everyday wear. They slide onto the tie and clip to the shirt fabric, creating a secure hold without entering the collar itself. For those who dislike metal contact near the neck, consider a lightweight tie bar that rests on the tie’s surface. Each alternative has its own look and comfort profile, so pick one that matches your shirt fabric, tie weight, and event type.
In Practice: Real-World Scenarios
You’ll notice the difference most when moving, talking, or standing for long periods. In a busy morning routine, a pin with a secure back saves you from adjusting the knot every few minutes. At a formal event, a sleek, minimal pin or a matching metal finish with your cufflinks creates a cohesive, modern look.
For example, at a midday business meeting, a locking collar bar pin reduced tie tilt during a crowded moment when you leaned forward to present. Your knot stayed centered, and the tie’s line remained clean for public-relations photos later that day. Practice with a mirror at home, then test the setup with varied collar spreads to build confidence.
Final Verdict
Start with a simple, properly sized pin and a clean shirt. If you wear ties often, a locking back pin is worth the extra control. For casual or occasional use, a classic straight pin with careful handling suffices. Choose based on your collar spread, fabric, and how much you move during the day. Practice makes the look effortless.
FAQ
How much does a collar bar pin typically cost?
Most collar pins cost between $5 and $25. Basic models run around $5-$12, while locking-back or tarnish-resistant finishes hover in the $12-$25 range. Expect $15-$40 for engraving or decorative embellishments. The right choice fits your budget and wear frequency.
How long does it take to apply a collar bar pin?
Most people can do it in 15 to 30 seconds. With practice, you’ll insert and lock in under a minute, aligning the knot and collar points first. A slow, deliberate motion prevents snagging and ensures the back sits flush. Time spent here pays off in a cleaner tie line.
Is a collar bar pin safe on delicate fabrics?
Yes, when used correctly, it is safe on delicate fabrics. Use a soft touch and avoid forcing the pin through silk or very fine cottons. If the collar is stiff or the fabric is prone to snagging, consider a lighter alternative like a tie clip. Always inspect the collar before insertion.
How do you remove and reapply a collar bar pin?
Gently back the locking back and pull the pin out through the collar layers. Reinsert using the same steps, ensuring the knot remains centered. Take your time to avoid tearing the fabric and recheck alignment after reseating. Regular practice reduces the risk of snagging or misalignment.
What are good alternatives if you don’t want to use a collar bar pin?
Tie clips, shirt clips, or decorative tie pins provide similar results without piercing the collar. Choose based on your shirt and tie weight. Tie clips are easiest for quick adjustments, while collar pins offer sharper lines for formal looks.