How To Mens Collar Pin? A Step-by-step Guide For Style
A collar pin adds a precise lift to the collar points, creating a clean line under a tie. This small accessory changes the visual weight of a shirt and enhances the overall sharpness of a suit. Confirm you have the right shirt, a compatible pin, and a steady hand. This guide provides practical, repeatable steps for using a collar pin effectively.
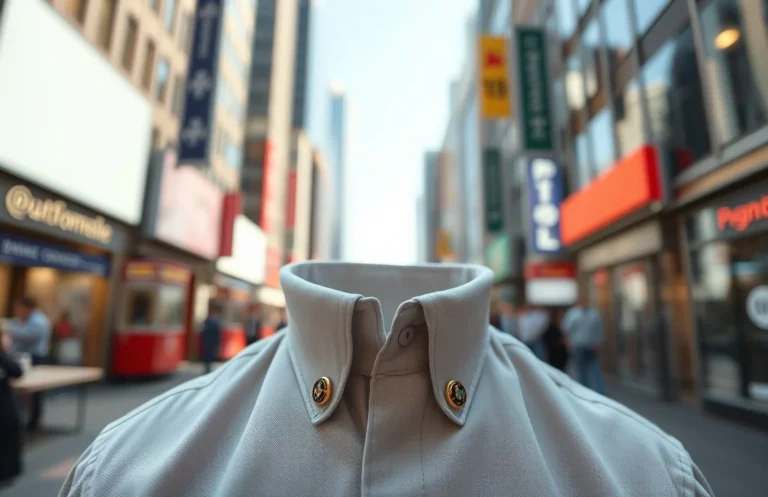
A collar pin is a small bar that passes through two holes near each collar point, lifting the points and keeping the tie line crisp. It works best on dress shirts with dedicated collar holes and a traditional spread or point collar. Choose a pin that sits flat against the fabric and matches your shirt’s color and finish. If unsure, test on a less visible area first to confirm comfort and alignment.
Key Takeaways
- What it does. Lifts collar points, creating a clean line under the tie.
- Prerequisites. Requires two holes per collar point and a matching collar pin.
- Sizing and fit. Select a pin that spans the distance between collar points without bending.
- Placement rules. Center the pin along the line between points and keep it flat against the shirt.
- Care and storage. Store pins in a small box to prevent nicks and loss.
What is a collar pin and when to wear it?
A collar pin locks the collar points together and raises the tie line. It’s best suited for formal or business attire, particularly on shirts with a standard collar and intentional holes near the points. The result is a subtle elevation and a cleaner vanishing line where the tie sits.
Collar pins create a crisper, more architectural look without a visible tie bar. They are not casual accessories; they convey a thoughtful, sartorial choice when paired with a well-fitted suit. For a modern, understated finish, a collar pin is a smart ally. Casual shirts without collar holes won’t accommodate a collar pin.
For example, a professional in a two-piece suit attending a board meeting can use a collar pin to add structure to a classic navy suit and white shirt. The effect is refined, signaling polish from a distance. You’ll notice the collar sits slightly higher and the tie line appears crisper when the pin is seated correctly.
what you need before you start
First, you need a shirt designed for this accessory – one with two holes near each collar point that align when the collar is flat. If the holes don’t align or if the collar is flimsy, the pin won’t sit evenly and could pull fabric. Second, select a collar pin that suits your shirt’s color and finish – stainless steel, brass, or gold-tone options are common.
A rigid, well-pressed dress shirt helps the pin sit properly. If the collar is stiff but the fabric is delicate, choose a thin, lightweight pin to minimize fabric stress. Clean the shirt before pin application to prevent lint or oils from transferring. Have a small, soft cloth handy to wipe the pin and collar points as you work.
how to wear a collar pin
1) Choose a shirt with properly spaced collar holes. Verify the holes on each side align when the collar is flat.
2) Prepare the shirt and pin surface. Lay the shirt on a stable surface and wipe the collar points with a soft cloth.
3) Align the pin with the holes. Hold the pin so the two ends will enter the holes in one smooth motion.
4) Insert the pin carefully. Push through both holes from the outside toward the inner collar until the head rests on the outside.
5) Check for even seating. The pin should sit flush and parallel to the collar line, not tilted or pressed into fabric.
6) Test the overall look. Button your shirt, adjust your tie, and confirm the collar lift feels comfortable and visually balanced.
For a precise result, practice once in front of a mirror to get a sense of hole spacing and pressure. If the pin binds, back it out slowly and reinsert with a gentler touch. Steady hands and calm motions yield the cleanest effect.
Choosing the right collar pin
Material choices influence durability and finish. Common metals include stainless steel, brass, and gold-tone alloys. Stainless steel withstands daily wear; brass offers a warmer hue; gold-tone pins provide a more formal touch.
Length and fit depend on your collar point distance and the depth of the holes. A pin that’s too long can bend or poke; one that’s too short won’t engage both holes. Finish matters too: matte finishes are subtle, while polished finishes catch light and look sharper in bright settings. If you switch shirts often, consider a neutral finish that blends well with most dress shirts.
Table: Common collar pin options
| Option | Materials | Pros | Cons | Best For |
|---|---|---|---|---|
| Classic Collar Pin | Stainless steel | Durable, low maintenance | May look bold on lighter fabrics | Daily business wear |
| Gold-tone Collar Pin | Brass or alloy finish | Warmer tone, dressier feel | More visible under bright light | Formal events, evening wear |
| Matte Finish Pin | Stainless or brass | Subtle, versatile | Less reflective, can feel dull | All-day wear, conservative looks |
| Polish Finish Pin | Stainless or brass | Sharp catch of light, modern | Can highlight fingerprints | Suits with high-contrast shirts |
Wearing with different shirt collars: spread vs point collars
For spread collars, the collar points sit farther apart, making the pin appear more balanced if holes align well. For point collars, the closer spacing emphasizes a clean vertical line; ensure the holes are not too near the tips to avoid crowding.
Your choice also depends on tie width and knot style. A narrow tie with a compact knot pairs well with a slim, subtle finish, while a broader knot benefits from a slightly more pronounced lift. If you wear a very stiff collar, test wearing the pin briefly to confirm comfort and movement.
Troubleshooting and common mistakes
Common issues include misaligned holes, fabric puckering, and discomfort. Correcting misalignment begins with removing the pin, rechecking the collar line, and reinserting slowly. If the fabric puckers, switch to a thinner or lighter pin and re-evaluate hole placement.
- Common mistake: Pinning through the fabric rather than the collar holes. Fix: Ensure the pin goes through the holes cleanly, resting the head on the outside surface.
- Common mistake: Forcing the pin when it resists. Fix: Back the pin out, align again, and press gently with even pressure.
- Common mistake: Choosing the wrong finish or color. Fix: Opt for a neutral or matching tone to minimize visibility.
Maintenance and care
Wipe pins after wearing to remove oils and sweat, preserving the finish. Store pins in a dedicated box or pouch to prevent scratches and loss. Regularly inspect for bent ends or dull surfaces; a quick buff with a soft cloth can restore some luster without removing plating.
If you reuse a pin across multiple shirts, clean it between wears to avoid transferring dye or residue. Avoid harsh chemicals or abrasive surfaces that could scratch or corrode the metal. With proper care, a good collar pin remains useful for years.
how men style collar pins today
A banker in a navy suit and crisp white shirt can wear a matte stainless pin for a polished, understated effect during client meetings. A lawyer at a courtroom conference might opt for a gold-tone pin to add warmth to black-tinted fabrics, pairing it with a charcoal suit.
Collar pins work best when the outfit is clean and well-pressed. A pin appears intentional rather than decorative when the shirt is tailored and the tie knot is proportional. If you’re new to collar pins, start with a conservative color and setting before experimenting with bolder metals.
Next actions: practice, shopping, and safe wear tips
Practice at home to build familiarity with hole alignment and insertion pressure. When shopping, select a couple of finishes and lengths that cover most shirt distances. Safe wear means gently removing the pin before washing or ironing to avoid snagging fabric or bending the collar points.
Begin with mid-range stainless steel or brass pins, progressing to a gold-tone option if you wear the accessory regularly. With the basics mastered, you can confidently incorporate collar pins into your formal ensembles.
FAQ
Do collar pins work with all dress shirts?
Collar pins work best on shirts with two holes near each collar point. If your shirt lacks these holes or has a soft collar, the pin won’t sit properly or could damage the fabric. Two holes per collar side are needed for reliable use.
How much does a collar pin typically cost?
Most collar pins range from $15 to $60 for mid-range options. High-end or designer pins can exceed this, but you don’t need to overspend for a sharp look.
Can you wear a collar pin with casual shirts?
Casual shirts usually lack collar holes or the right stiffness, making collar pins inappropriate. For casual looks, skip the pin and focus on fit, fabric, and open collar styling instead.
How do you remove a collar pin without damaging the shirt?
Gently rotate the pin back and forth while guiding it out of the holes. If it resists, stop and re-center the holes, then ease the pin out slowly with minimal force.
What’s the difference between a collar pin and a collar bar?
A collar pin inserts through holes to lift the collar points, while a collar bar connects the points across the collar. The pin creates a lift; the bar creates a broader, anchor-like effect. Both require properly spaced collar holes to work.
A collar pin is a precise, deliberate tool for elevating a shirt’s line. Start with a solid, neutral finish and a shirt with proper holes, and master the look in minutes. Practice your insertion, keep the fabric clean, and gradually expand to bolder finishes as you gain confidence.