How To Pin Collar Brass Police?
Pinning brass collar insignia
Pinning brass collar insignia cleanly and securely on a police uniform communicates readiness and discipline. You need the right tools, precise placement, and a secure finish. The goal is a crisp look that stays put through daily wear, training, and weather. This guide offers a practical, field-tested method to pin collar brass insignia confidently.
Collar insignia placement hinges on alignment and secure fastening. Center the insignia on the collar point with a vertical orientation, use a pin with a clutch back, and add a second back if possible to prevent rotation. After pinning, tug gently to ensure stability and that the fabric lies flat. With proper technique, the insignia won’t shift during routine activity.
Key Takeaways
- Placement matters. Center the insignia on the collar point and confirm symmetry before securing.
- Use proper fasteners. A standard pin with a clutch back plus a second back reduces loosening.
- Alignment check. Line the device vertically with the seam and ensure equal height on both sides.
- Test after pinning. Tug gently to confirm the badge stays fixed and fabric shows no puckering.
- Maintenance cue. Inspect monthly for looseness and replace worn backs promptly.
Tools and supplies for pinning collar brass police insignia
A clean setup makes the job simple. Gather a small toolkit: a brass insignia pin with backing, an extra clutch back, fine-tipped tweezers, a fabric-friendly marker, small scissors, and a lint-free cloth to wipe the metal. A compact travel kit works well for field use, and you’ll thank yourself when you’re on the move.
You should also have a ruler or caliper to verify consistent placement, and a simple magnifier if the insignia sits in a tight collar area. A soft pad or folded cloth underneath the collar helps keep the fabric stable while you work. If your department allows sewing backings or alternative fasteners, keep a spare sewing needle or tiny screw-back tool in the kit as a backup option.
Tools and supplies aren’t glamorous, but they prevent misalignment and rework. The moment you skip prep, you’ll pay with a crooked badge and a crease in the uniform that draws attention. Invest five minutes to gather gear, and the actual pinning takes minutes, not hours.
Proper placement and etiquette for brass collar insignia
Departments expect insignia centered on the collar point and flush to the fabric. The top edge aligns with the collar’s outer edge, and the device remains vertical relative to the chin line. Consistency across the squad reinforces a professional, disciplined look.
Many agencies specify both the position and the number of fasteners per insignia. If two-backs are allowed and warranted, use them. Even with extras, aim for a discreet finish that doesn’t crowd the fabric or restrict airflow at the collar. Before you start, check the department’s dress code to avoid last-minute returns or re-pinning.
Set the insignia on a flat surface first, measure the distance from the collar seam to the badge base, then translate that measurement to each collar. Use a mirror to verify symmetry from both sides. If you notice any tilt, readjust immediately before securing the backs. A misaligned insignia distracts during patrol or ceremonial duties.
Step-by-step method to pin collar brass police insignia
Inspect the insignia and collar for burrs, loose threads, or fabric wear. If the collar has stiff interfacing, ensure it’s flat and not lifting at the edge. A clean working area reduces the risk of slipping and misplacing the badge.
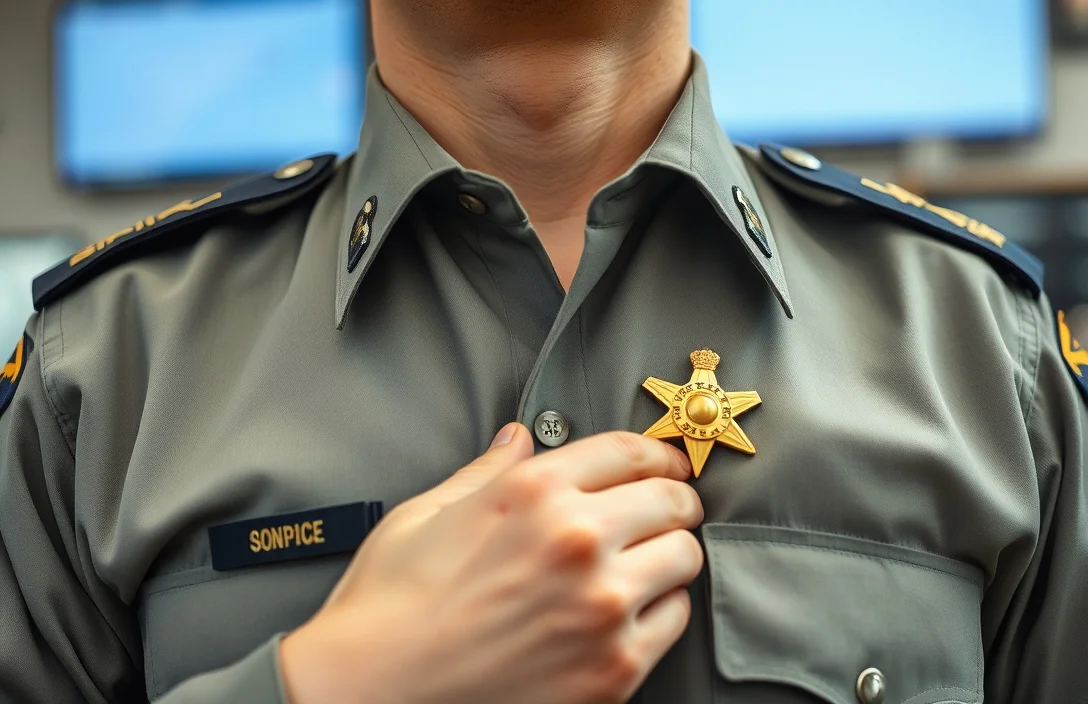
1) Mark placement. Place the collar flat and lightly mark the center point on the fabric with a fabric marker.
2) Align the insignia. Hold the badge by its pin shaft and align the top edge parallel to the collar edge.
3) Start the pin. Insert the pin through the collar from the outside, keeping the badge aligned.
4) Add the backing. Slide the clutch back onto the pin from the inside.
5) Apply a second back. If you’re using two-back security, add a second clutch back on the inside to prevent rotation.
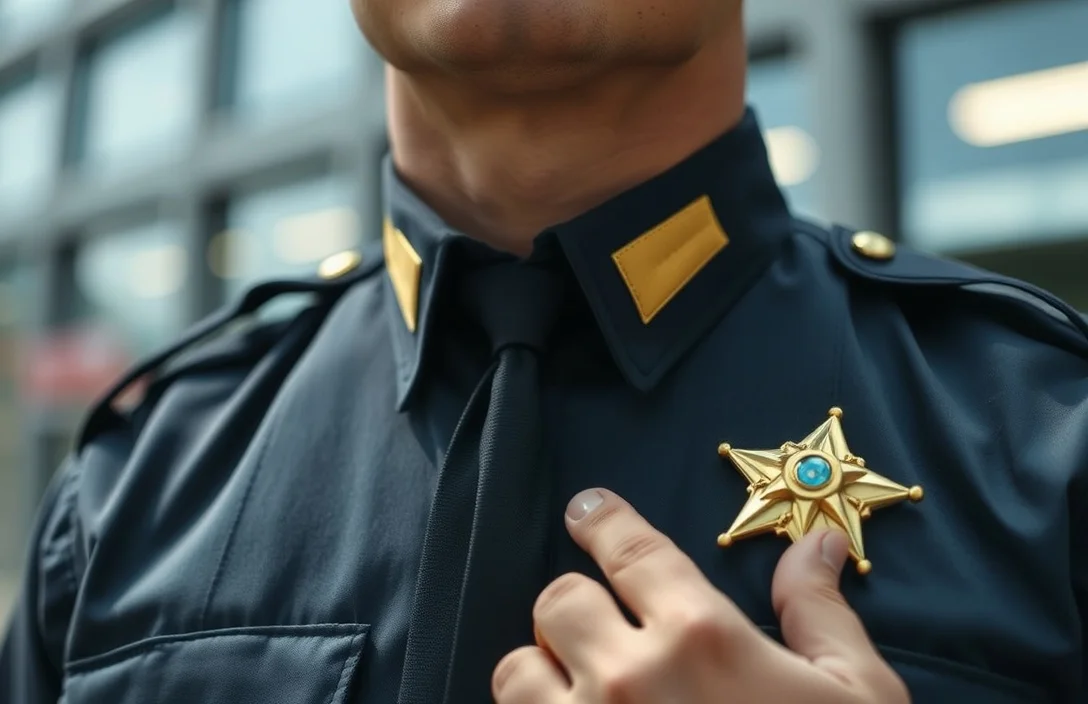
6) Verify alignment. Stand up, look in a mirror, and confirm the insignia is straight and centered.
7) Final check. Gently tug the badge to test for looseness and adjust if necessary.
You may need to re-pin if the badge shifts during movement or if the fabric puckers. Work slowly the first time and document the exact placement on the left collar for consistency across days. If you’re wearing gloves, use tweezers to help set the backing without marring the brass.
Variations by collar type and alternative fasteners

Rigid, high-collar designs tend to hold a badge securely with a single backing, while softer collars benefit from a second backing or a micro-screw attachment to resist movement. If the badge is heavier, consider a screw-back option if your department supports it.
Sew-on alternatives exist for special units or ceremonial duties. Sew-on devices distribute weight differently, reducing backing loss but requiring careful stitching to avoid puckering or thread fraying. The core principles stay the same: center, align, and secure with controlled pressure so the device remains flush.
When choosing fasteners, balance reliability, ease of removal, and fabric integrity. A two-back setup often offers better resistance to rotation and snagging, especially during high-movement tasks. If you expect frequent removal or transfer between uniforms, plan for easy-release options that won’t leave permanently damaged fabric. The right choice depends on your role, department guidelines, and how much wear the insignia endures.
Troubleshooting common issues
Issue 1: Insignia tilts after movement.
Cause: Uneven pressure on the backing or a misaligned pin.
Fix: Re-seat the badge, align vertically, and add a second backing if allowed. Tug test again.
Issue 2: Fabric puckering around the badge.
Cause: Over-tightening or fabric compression.
Fix: Loosen slightly, re-position, and secure with minimal pressure to keep the fabric smooth. Use a magnifier if needed to confirm even contact.
Issue 3: Backing backs slip or fall off.
Cause: Worn or mismatched backs, or a too-long pin.
Fix: Replace with the correct size backing, and verify pin length fits the collar depth.
Issue 4: Badge sits high on one side.
Cause: Uneven collar or misplacement.
Fix: Mark placement anew on the adjusted side and verify the alignment in a standing posture.
Issue 5: Pins bend or snag on clothing.
Cause: Rough handling or poor tool selection.
Fix: Use fine-tipped tweezers and a steady hand; replace bent pins to avoid fabric damage.
Maintenance and care after pinning
A pinned insignia should be checked at the end of each shift. Inspect the backing for wear, confirm the badge remains symmetrical, and wipe brass surfaces with a soft cloth to prevent tarnish buildup. If you notice any looseness, check the backings and the pin shaft for deformation, then re-pin as needed.
For routine care, keep the insignia free of oils and moisture by wiping with a dry cloth after exposure to sweat or rain. In humid environments, consider a quick recheck after long patrols to ensure nothing shifted. Proper off-duty storage means keeping a spare badge kit with clean backs and a small mirror for quick checks.
In practice: real-world scenarios
For a patrol officer, the collar insignia must endure long shifts, frequent movement, and occasional rain. A two-back method often proves most reliable during high-activity duties. The badge should remain centered after repeated arm movements, such as drawing and holstering gear.
For a ceremonial unit, the insignia might be more visually prominent and less subjected to rough handling. A single high-quality backing with precise alignment can produce a pristine look that holds up under bright lighting and public scrutiny. In both cases, consistency across uniforms signals professionalism.
Develop a quick daily routine: check alignment, perform a tug test, and visually inspect for puckering or misalignment. If you find any issue, correct it immediately to avoid a visible flaw during duty.
A practical tip from real-world use: keep a small mirror in your kit to confirm symmetry from multiple angles. In crowded or dim environments, a quick check helps you avoid missteps before a briefing or roll call.
The verdict is simple: center, secure, and verify. A disciplined approach keeps insignia sharp and your uniform signage legible from a distance. The routine pays off in uniformity and professionalism across shifts.
To proceed, confirm your department’s permissible fasteners and pin lengths before changing a current uniform. If you’re outfitting a new uniform, plan the placement during tailoring to avoid rework.
Next actions: practice the steps at home with an inexpensive replica badge, then migrate to live-duty insignia under mild daylight. Once you’re confident, schedule a quick alignment check with a supervisor to ensure compliance.
FAQ
How do I know which backings to use on my insignia?
Use the backing type specified by your department; if none, start with a standard clutch back and consider a second back for heavier badges. The goal is secure, distortion-free placement that can survive daily movement.
How long does pinning usually take for a standard insignia?
Five to ten minutes per insignia with the right tools. If you’re new, allocate about 15 minutes and practice on a spare collar to reduce errors on duty day.
What if the badge loosens during a shift?
Stop and re-pin immediately. Remove the backing, check alignment, replace worn backs, and re-seat the badge. Then perform a tug test to confirm stability before resuming duty.
Can I sew or glue insignia instead of pinning?
Sewing or gluing is possible in some cases, but many departments prefer pins for quick removal and standardization. If you must switch methods, verify that the chosen method complies with departmental policy and won’t damage the uniform fabric.
Are there safety concerns with pinning badges?
Keep pins away from snagging areas, and ensure backs are fully seated to prevent exposure. Regular checks reduce snag risk and maintain a clean, professional look.
Closing verdict: Start with a clean toolkit, place the insignia precisely at the collar point, and secure it with a backing that suits your collar style. Practice with a spare badge, verify alignment in a mirror, and maintain a quick inspection habit to keep your uniform sharp.