
How To Make Dress Shirt Collar Smaller Safety Pin?
Pinning the back of your dress shirt collar is a quick fix that reduces collar gap by about 2-4 mm. This guide shows you how to do it cleanly and safely, minimizing fabric damage.
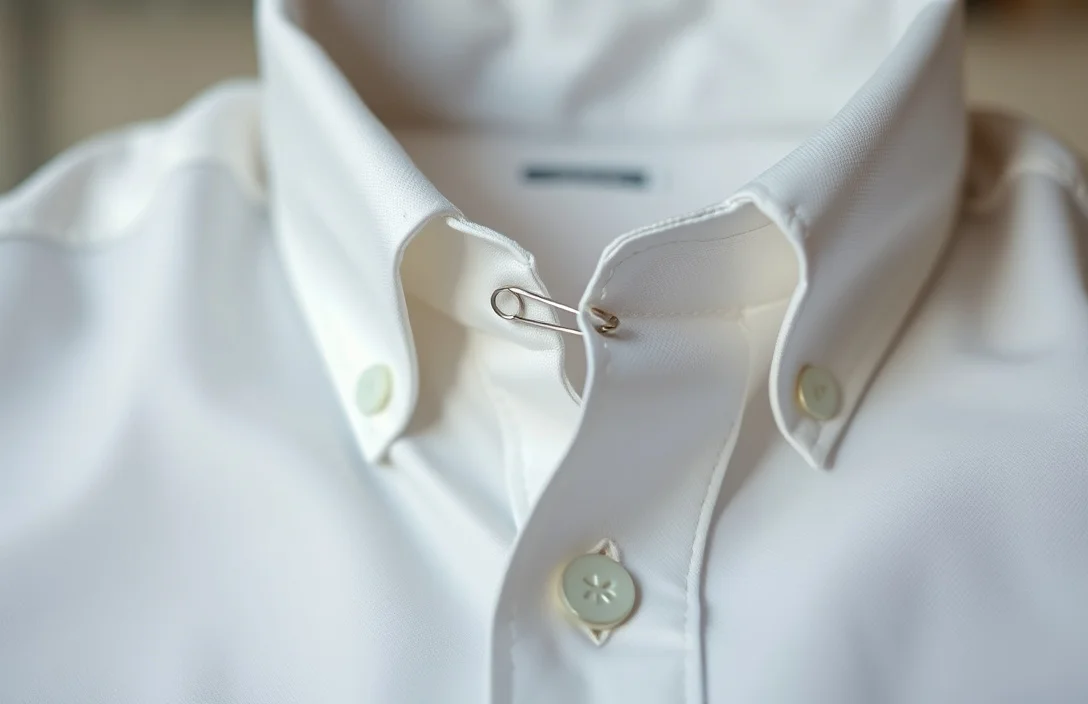
A safety pin at the back of the collar draws the two collar points inward, tightening the fit. Use a small, discreet safety pin and backstitch through the inner placket. Keep the adjustment light and test the fit to avoid puckering.
Key Takeaways
- Pin placement. Pin through the back of the collar to hide the adjustment.
- Minimal tension. Aim for a 2-4 mm inward draw to prevent puckering.
- Choose the right pin. A small, flat safety pin minimizes fabric snagging.
- Wear-test. Try the shirt on and move; readjust if the collar feels loose.
- Fabric sensitivity. Test on a seam edge first if the shirt is lightweight or slippery.
- Temporary fix. Plan for a longer-term solution if collar looseness persists.
What you need
You only need a small safety pin and a plan. A plain brass or plated safety pin that lies flat against the fabric works best; avoid bulky pins that can snag. A mirror helps check if the pin sits neatly along the collar line. If your shirt has a detachable collar or collar stay system, you can still use the pin as a quick first step while deciding on a longer-term fix.
Before you start, assess the fabric and collar construction. Woven cotton collars hold a pin better than slick blends, but any fabric can snag if handled too roughly. Remove lint from the collar edge and lightly press to smooth any natural curl. If the collar shows visible wear or fraying, consider a less invasive approach or a professional fix to avoid further damage.
Quick fix: the safety pin method explained
For a clean look, focus on pinning the back of the collar. Pinch the two collar points inward enough to close the gap, then secure with a pin running parallel to the seam line. The goal is a subtle adjustment that goes unnoticed after buttoning up.
Insert the pin from inside the shirt, hiding the pin head. Thread it through the inner layer of the collar and the outer edge near the seam, avoiding the front placket. Leave the pin closed and press lightly to ensure the collar sits evenly. If puckering appears, remove the pin and try a lighter adjustment.
how to pin the collar safely
- Inspect the collar and collar stand for wear and smoothness.
- Unbutton the shirt and lay it flat; fold the collar toward the chest to estimate inward tension.
- Insert a small safety pin from inside the collar, near the center back, and thread through to the outer edge, keeping the head hidden.
- Close the pin and press gently to set the position; check both sides for symmetry.
- Try the shirt on, move your neck, and note any tugging or pinching.
- If the fit remains loose, remove and re-pin with lighter tension.
- Remove the pin before washing or use a gentle cycle to minimize wear.
- After removal, inspect the fabric for snags or tiny holes and trim any loose threads.
Variations and tweaks
The basic back-of-collar pin is simple, but you can adjust based on your shirt type and desired visibility of the fix. For a stronger hold, use two pins through the back of the collar, spaced vertically to distribute tension and reduce the risk of a single point pulling too hard.
| Method | Pros | Cons | Best For |
|---|---|---|---|
| – | – | – | – |
| Safety pin back-of-collar | Quick, invisible from the front, no permanent changes | Can snag fabric if oversized, needs removal after wear | Casual shirts with looser collars |
| Collar stays with elastic clip | More durable, stays aligned, reversible | Requires access to stays or clips, may alter stiffness | Dress shirts with standard collar construction |
| Tailor alterations | Long-term, precise fit, professional finish | Costs and time, permanent | Frequent collar loosening, formal wear |
The safety pin approach is a temporary fix. For button-downs or shirts with clean front plackets, keeping the adjustment hidden makes it less noticeable. For fabrics that don’t respond well to pins, consider collar stays or a light alteration by a tailor to maintain the shirt’s integrity over time.
Troubleshooting and risks
Pinned collars can leave small marks if you over-tighten or reuse the same pin. If fabric snagging occurs, reduce the inward pull or switch to a smaller pin. Puckering indicates too much tension or incompatible fabric. Remove the pin, rest the collar for a couple of hours, and try again with gentler pressure.
Uneven collar front after pinning usually means the pin isn’t aligned with the seam. Reposition the pin along the seam line and check symmetry. If you still see a tilt, abandon the pin method and consider collar stays or a tailor fix. Avoid forcing the pin through to the outer placket if unsure about the fabric’s resilience.
Alternatives and longer-term options
A non-permanent solution can still provide a clean look without risking fabric damage. Collar stays in stay pockets maintain a crisp edge with little ongoing effort. Clip-on collar stays or magnetic stays work well on shirts with removable stays. For frequent collar looseness, a tailor can adjust or replace the collar band.
If you want reusable options, look for adjustable collar stays or a discreet collar clip set. These add stiffness to the collar, reducing the need for pins and providing a neater silhouette. Often, a professional alteration is the most reliable route for a long-term, wrinkle-free collar.
Real-world tips and quick fixes
A safety pin can save you in a pinch, but it’s not a substitute for a proper fit. The key is to keep the adjustment subtle. If you’re dressed for a formal event but your collar is still loose, switch to collar stays for the next wear or arrange a quick alteration later. Treat the pin as a temporary bridge, not a permanent solution.
To maintain a natural look, avoid placing any pin near the front edge where it might catch light or snag a tie. If you must use a pin, choose a color that blends with the shirt or a transparent shade to reduce visibility. Practice on a rarely worn shirt first to gauge how the fabric behaves with the pin.
Maintenance and removal
Remove the pin by pulling in the direction opposite to insertion to avoid snagging the fabric. After removal, inspect the collar edge for small snags and trim any loose threads. If you notice new wear, it’s time to stop using pins and switch methods. Wash and dry the shirt as usual, but consider air drying to reduce stress on the collar after pinning.
Keep pins in a dedicated sewing kit to avoid confusion with other fasteners. If you forget to remove the pin before washing, heat or friction can exacerbate fabric wear. A quick post-wash check can catch issues early, preventing long-term damage.
FAQ
Can I use any safety pin for this, or should I choose a specific type?
Use a small, flat safety pin with a smooth head. Avoid oversized or decorative pins that can snag fabric or make the fix visible. For delicate fabrics, a pin with a thin shaft minimizes pull and avoids holes.
Will a safety pin damage the fabric over time?
Repeated pinning can create small holes or snags, especially in lightweight fabrics. Use the lightest tension and limit wear to intermittent use. If you see signs of wear, switch to collar stays or a tailoring option.
How long can I leave a safety pin in place?
As a temporary measure, remove it during the day and only reapply if necessary. Do not leave a pin in for extended periods, as movement or washing can shift it and damage the fabric.
Are there safer alternatives than safety pins?
Yes. Collar stays and stay clips offer non-permanent, fabric-friendly solutions. For frequent collar loosening, a quick tailor adjustment provides a proper fit without snagging risk.
What should I do if the collar keeps loosening after pinning?
Schedule a proper alteration if the problem recurs. A collar that continually loosens may indicate a worn collar band or a need for re-stitching, which a tailor can address.
Practical verdict and next
A safety pin is a quick fix for collar gaps, not a long-term solution. If you frequently need to adjust collars, invest in collar stays or plan a tailoring session. Start with a single small pin on the back of the collar, test the fit, and remove it before washing. If the problem persists, explore more durable options.
Frequently Asked Questions
1. How do I choose the right safety pin for adjusting my dress shirt collar?
Opt for a small, flat safety pin that lies against the fabric without causing bulk. Avoid oversized or decorative pins, as they can snag the fabric and make the adjustment more noticeable.
2. Can I use this method on all types of shirt fabrics?
This method works best on woven cotton fabrics, which can hold a pin securely. For lightweight or slippery materials, test the pin on a seam edge first to avoid damage.
3. How tight should I pin the collar to avoid puckering?
Aim for a gentle inward pull of about 2-4 mm to minimize the risk of puckering. If you notice any puckering, remove the pin and re-adjust with lighter tension.
4. Is this a temporary fix, and how often can I use it?
Yes, using a safety pin is a temporary solution for collar looseness. It’s advisable to remove the pin after each wear and consider a more permanent fix if the collar continues to loosen.
5. What should I do if I notice fabric damage after using a safety pin?
If you find snags or tiny holes after using a safety pin, stop using this method and consider alternatives like collar stays or professional alterations. Regularly inspect the collar for wear to prevent further damage.